Yesterday, Katie said: “Mommy, when we move, if there’s an extra room, can we set it up just for sewing?”
I smiled. “That’s my dream home, Katie.”
Not likely to happen any time soon, but we can have fun imagining it.
I have been avoiding teaching my daughters how to sew. As always, it’s the learning curve. I didn’t want to have to be patient for hours/days/weeks while they learned a new skill. To force myself to do it, I gave Katie a quilt kit for Christmas. The quilt is sized for a doll, and is meant to be hand sewn. Smart cookie that she is, she did the first 3″ line of stitching joining two patches and then asked to switch to the machine. We had that quilt completed in a few hours.
She was not very diligent about maintaining a 1/4″ seam, but it was just a doll quilt.
Jenny saw this and decided she wanted to make a quilt for the new baby. We opted for red/white/blue, since we don’t know the baby’s gender and because I had a bunch of red/white/blue fabric on hand. We finished cutting those squares yesterday and designing the layout. I did have to go back and trim up all the squares to make them the same size. Katie had helped, but cut 5″ x 5″ squares instead of 4″ x 4″. And I have a plastic quilt block pattern which is 4 1/2″ x 4 1/2″ to have a 4″ x 4″ end product, but I did not realize that it was like that. I cut a bunch of 4″ wide fabric strips, and the girls used the pattern to cut them into “squares” but they were 4″ x 4 1/2″ instead.
This was MY learning curve, and I don’t seem to mind those so much.
We then started sewing the patches into strips, making sure we got the design right. Jenny picked up very quickly on the need to pay attention to which block came next. After I did two strips, she decided she wanted to do the sewing. So, I showed her how and (after Katie’s sewing performance), stressed the need to keep the edge of the fabric aligned with the edge of the foot. I even made her rip out one seam and do it again. She did great. After walking her through a few strips where I aligned the fabric and showed her exactly where to stitch, I let her do it by herself while I watched, and she demonstrated that she thoroughly understood what she was doing. She finished all the remaining strips with minimal assistance.
I did have to re-thread the bobbin at one point. And re-thread the needle after the thread broke.
And there was one point where Katie was showing her how to use the iron, and I was across the room cautioning, “You MUST be careful with the iron. It will burn you. I have a scar on my leg from being burnt by an iron 35 years ago. Pay close attention!” My words were immediately followed by “Ouch!” and Katie ordering her sister to put her hand under cold running water. It’s a pretty ugly burn, but she took it like a trooper.
After the doll quilt was finished last weekend, Katie decided that she wanted to make a quilt for her bed. I am unhappy about the store-bought quilts they have. They just have not held up in the wash and with normal childhood wear and tear (jumping on beds, being used as a tent, etc). But finding the time…
But since Katie did such a great job on the doll quilt, I decided to go ahead and jump in with not just her quilt but three coordinating quilts for the three girls. We went to the fabric store last week and bought enough to get started with a vague idea of a pattern. This past week, we finalized our design, and yesterday we began to cut the shapes: each block is 9 pieces, but there are 2 different sized squares and a rectangle. One square is large (10″ x 10″ when done) and we found three fabrics with the same pattern but different colors: light blue, lavender and pink. Each quilt will have that large square be a different color, but the other colors will be in the block as well. Each quilt will be unique, but they will all go together well.
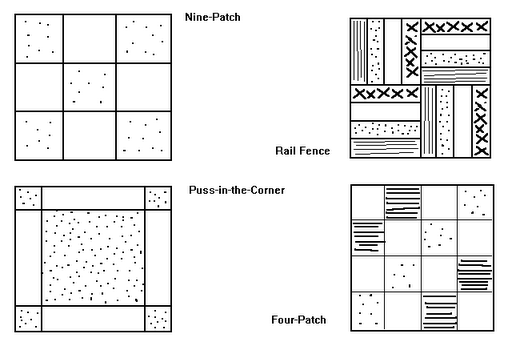 |
| We’re using the Puss-in-the-Corner |
I also got some great coupons in the mail this week (50% off!!), so we’ll go back to the store after Mass today and see if they have enough of this gorgeous lavender paisley fabric that we want to use as a backing for all three quilts. Katie can’t wait to start piecing her blocks together.
I don’t regret not doing this sooner. I think the timing is perfect. I’m pleased at how well both girls are sewing and their comprehension of the way the pattern goes together. I’m enjoying how they are working well as a team and helping each other. And since Katie’s doll quilt was also my first quilt, I’m enjoying learning this with them. I wasn’t worried that it would be difficult (I tend to be undaunted with sewing projects even if I do spend quite a bit of time ripping seams and trying again). But I was concerned that the project would be tedious and frustrating if their involvement required too much effort from me. Instead, I am finding that the monotony of measuring, cutting and stitching is very pleasant when you have nice companions.

I have to laugh because I'm always thinking I'm such an impatient mother for not sitting with my girls (6, 4, 2) teaching them how do sew, etc. Phew. Honestly: phew!!
Oh, good! No guilt. Just wait until they are older, it will be so much easier!!
Way to go! I tried sitting with my daughter (9 y/o) and sewing last summer, but became frustrated. I did buy her a book and some fabric for Christmas to get us going again. You might already know this trick; I learned this when I started quilting and thought I would share. When I lay out my quilt blocks on my floor and have them the way I want them, I take the second column blocks (on the left) and flip them onto the first column so right sides are together and the stitching line is on the right. Then I start at the top and place each pair on the row beneath them so you have a stack on the bottom with your first set of blocks to piece. Then I take each column after that and only stack that column on top of each other going from top down. Once all the columns are stacked, you have piles at the bottom. Start with the first column pile and stack on top going from Left to Right. You end up with one stack, but all your blocks are ready to be pieced. Chain stitch your first set of column blocks together and then you will get to the third column facing up in the pile. Start back at the top and add each subsequent block making another column. That way when you are done attaching your blocks, you only have to press seams in opposite directions for each row, and it makes sewing the top easier. It also helps when you have to stop while attaching the blocks and you can just jump back in rather than having to think through it.
Just thought I would share.
Hope you are feeling well,
Beth
I could barely read the quilting part because I couldn't stop laughing about the “extra room” comment. As if!! My sister is a master quilter, so if you run into any sanfus or need some assistance, let me know and I'll put you in touch.